从零开始的DFT工程师!(1)
欢迎来到从零开始的DFT工程师第一期。
本期主要进行verilog和systemverilog的相关软件安装和基本语法复习。
verilog
关于运行verilog的软件选择很多,这里选择使用vivado和iverilog+gtkwave.
vivado的安装我之前写过,具体是在archlinux(当时的linux内核版本未记录)上进行vivado2024.2版本的安装,详情可见此处,但是由于此后相关库版本更新,需要自行创立软连接来补全相应的库(下载旧版本的库首先需要进行版本管理,这本身就是比较复杂的事,况且很多更新都是更新了实现,接口没有变化)。
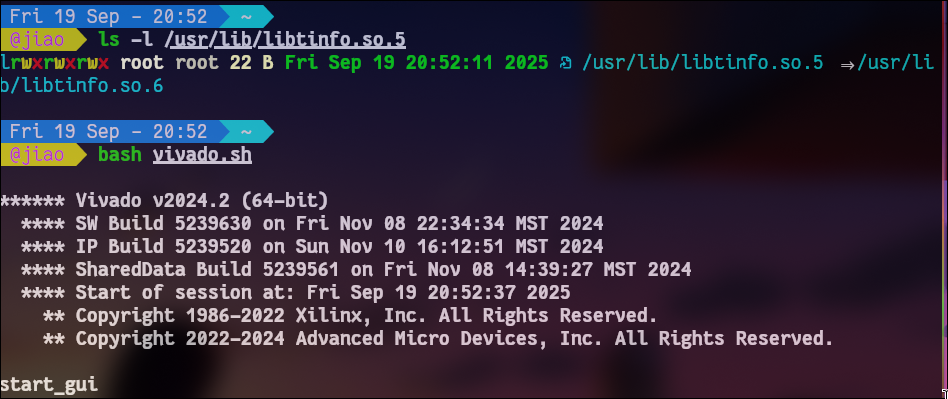
我们用一下例子做一个简单的介绍:

这里我们发现vivado提示说找不到libtinfo.so.5, 我们已经有的是libtinfo.so.6,去下载一个新的不仅占地方,有些时候还会导致引用模糊相互冲突,这里可以用一个取巧的办法,也就是给libtinfo.so.6 创建一个名为libtinfo.so.5的副本,并指向libtinfo.so.6,如下操作:
1 |
|
这样我们就简单的完成了vivado启动必须环境的准备。
iverilog+gtkwave 的下载十分简单,只需用pacman下载即可:
1 | sudo pacman -S iverilog gtkwave |
systemverilog
关于systemverilog相关软件的下载就有些麻烦了。相关的软件有:
QuestaSim,支持systemverilog+UVM,coverage,SVA,transcation-level仿真。
Synopsys VCS,优势在于性能和大规模的SoC仿真支持,也支持UVM.
cadence Xcelium(Incisive),功能和以上类似,似乎通信和ASIC公司用的多。
但是尴尬的是这三个都是闭源软件,下载比较困难,不过也都是有办法下载的,之后我会慢慢更新三个软件的下载方式。
此处我有一个cadence软件的虚拟机,包含 cadence virtuoso + simvision + incisive,详情如下:
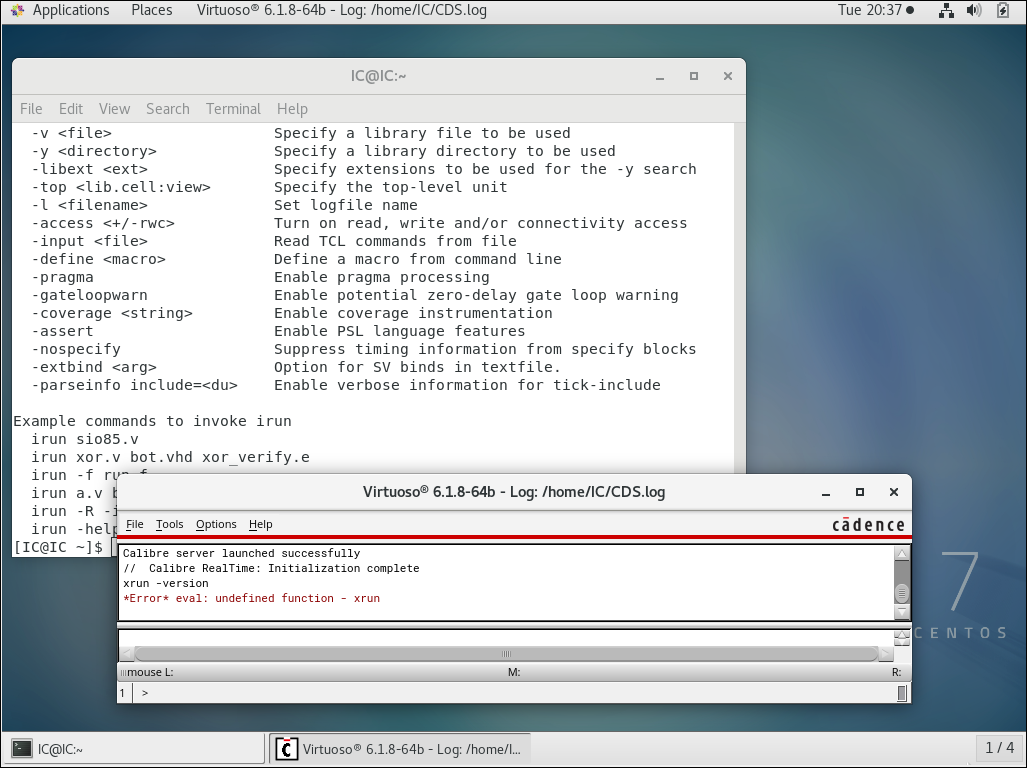
虽然incisive是一个较老的版本,virtuoso版本也只有6.1.8-64b,不过简单的需求也已经可以满足了。
对于开源工具来说,verilator是一个选择,但是当前他对于UVM的支持还不太好,不怎么建议使用;slang和surelog+UHDM是一个新兴的工具,但是目前似乎更多的是实验性质,工业界用的很少,不过还是展示一下下载方式:
1 |
|
这些工具的使用我们之后再谈。
verilog syntax
此处我们复习基本的verilog常用的设计语法,testbench写法,以及moore和mealy状态机的简单设计方法。
module define
1 |
|
data type
wire: for signal wire, mostly used for signal that connect modules, must be give value continuously, can not store value.
reg: register type, but not have to be real register, it can hold value until its value is changed.
assignment
- assign, used for combination logic.
1 |
|
- process, used for timing logic.
1 |
|
the difference between = and <=: = for blocked assignment, next must be excute when the previous statement completely done; <= for unblocked assignment, all unblocked statement will be executed at a same time.
timing logic
- always: it can be triggered by clockedge.
1 |
|
and can be triggered by changes in signal.
1 |
|
@* means monitor all the signals that appeared in the always block.
verilog testbench syntax
basic structure
1 |
|
system task
- $monitor: print signal(when changed).
1 |
|
- $display: output(instantly) debugging info.
1 |
|
$strobe: low execute priority, so it can print info after timing assignment(after current simulation step).
1 |
|
design for state machine.
define state.
state trans.
according state(and input, mealy) and output.
systemverilog syntax
systemverilog 是用于硬件描述和验证的语言,扩展了传统的verilog,增加了更多用于验证,测试平台搭建,高级数据类型,精确的并发控制等新特性,结合硬件描述和高级语言的特点,被广泛的用于硬件设计以及其验证测试自动化。由于并非课程必修(此处参考XJTU微电子科学与工程,集成电路与计算机科学与技术实验班的培养放案),此处会较为详细地进行介绍。
data type(commonly used)
- logic: in systemverilog, it is used to replace the reg and wire, its value can be 0, 1, x, z.
1 |
|
bit: one bit.
byte: 8 bits.
1 |
|
- int: 32 bits signed integer.(like integer in verilog).
1 |
|
- real: float, user for valid and test.
1 |
|
struct: combine signals.
union: signals share common memory, all the sigals’ address is same, so the memory size is decided by the biggest member.
1 |
|
1 |
|
module define
just like verilog, use module and endmodule define a module, use interface to pass signals.
1 |
|
process control
systemverilog have always_comb , always_ff, and always latch to decribe combine logic, timing logic, and a latch.
always can be used for combine logic in verilog (always @*)
- always_comb: for combine logic, do no depend on clock edge.
1 |
|
- always_ff: for timing logic.
1 |
|
- always_latch: a latch, but recommand do not use.
1 |
|
constraints and interface
- constraints, we can limit the value’s range of data-type.
1 |
|
- interfaces, package the signal sets, for interconnect among modules.
1 |
|
task and function
- task, perform certain behavior, can have multiple input and output parameters.
1 |
|
- function, execute a computation, return result instantly.
1 |
|
assert and cover
- assert: verify signals meet a specific condition or not, if not, an error will be thrown.
1 |
|
- cover: track whether certain conditions occur.
1 |
|
class and object
class define:
1 |
|
class instantiate:
1 |
|
cycle control
1 |
|
parallel execution
1 |
|
总之,systemverilog在硬件的设计和验证中提供了一些增强功能,新的数据类型,精确的时序控制,更高级的断言,覆盖,约束机制,以及接口和面向对象编程的支持,都让systemverilog不仅适用于硬件设计,更有很强的验证和测试平台的构建能力。
这里推荐两个SV学习网站:
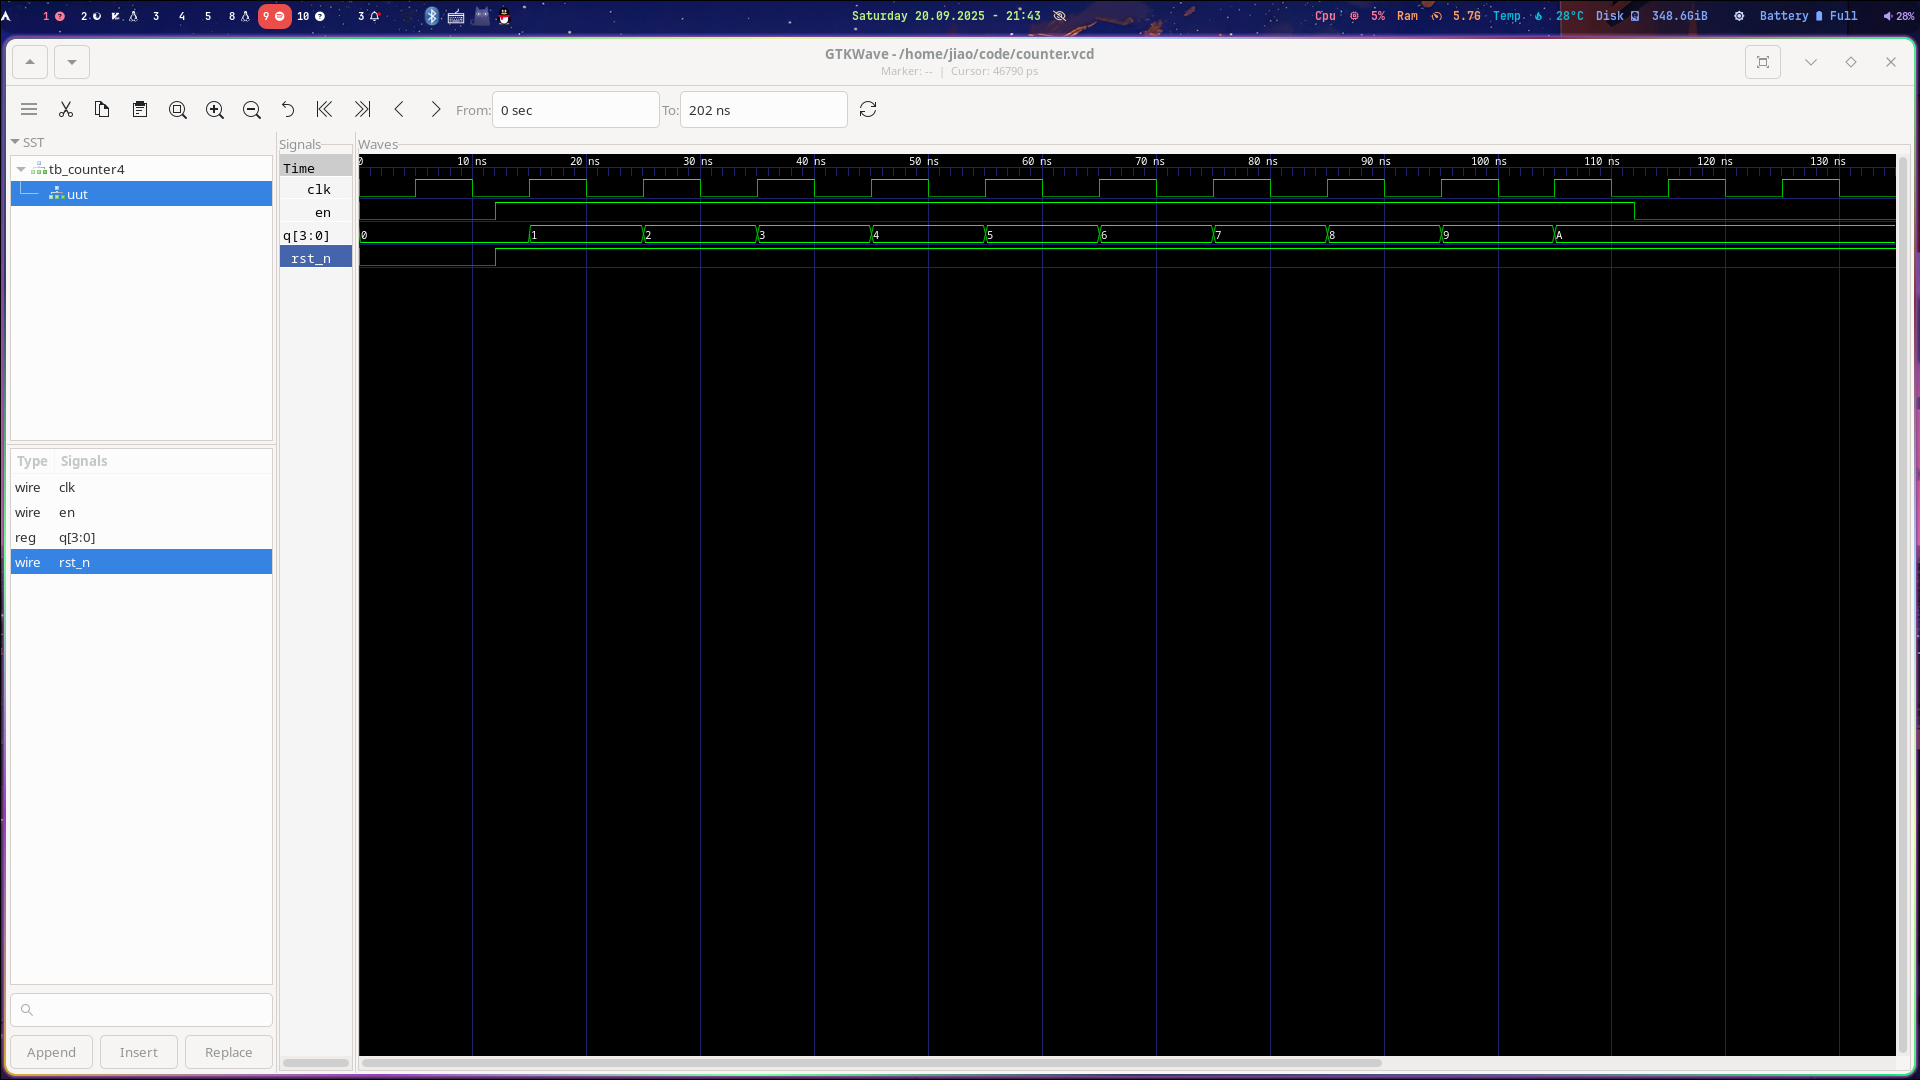
demo of iverilog + gtkwave
现在我们进行一个iverilog和gtkwave组合技的使用回顾。
我们写一个counter.v 文件,内容如下:
1 |
|
我们编写tb_counter.v文件如下作为测试文件:
1 |
|
那么我们现在有了设计文件和测试文件,我们就可以进行编译和运行了。
1 |
|
结果展示如下:
插播一条重要设置: virtualbox shared folder
由于我们的cadence运行在一个虚拟机里面,为了使得文件交流方便一点,创建一个shared folder就能很大程度上提高我们的工作效率。
这里我使用的工具是virtualbox,选择他的主要原因是他可以在很多linux版本平稳(相对于隔壁vmware接口常变来说)使用。不过virtualbox创建shared folder比vmware要麻烦一点,因为他的shared folder是需要依托guest additions来完成的。
创建shared folder
我们首先在virtualbox的设置里面创建一个shared folder。
在virtualbox里面,global folder 的意思是所有的虚拟机都可以访问,machine folder是只有指定的虚拟机才能访问,显然选择machine才是更合理的。之后我们选择path为宿主机的实际路径,比如说我选择的是~/cadence_shared/这个文件夹,access选择full,并且选上auto mount.
Guest additions
此时我们打开虚拟机发现并没有出现共享文件夹,自己创建一个也无法实现共享文件的功能,这是因为我们需要配置好guest additions才能正常使用这一功能。
我们需要关闭虚拟机,在virtualbox里面选中虚拟机,在settings的storage下面,找到controller:IDE或者是controller:SATA,点右边的小光标add optical drive, 选择系统自带的VBoxGuestAddtions.iso, 选择挂载;
之后我们就进入虚拟机,挂载这个iso:
1 |
|
如果没有编译环境,就先安装:
1 | sudo yum install -y gcc kernel-devel kernel-headers make bzip2 dkms |
把当前用户加入vboxsf组:
1 |
|
安装完成之后重启虚拟机,我们就可以发现一个sf_cadence_shared,这个就是共享文件夹了。
从零开始的DFT工程师! homepage
project homepage is here.